Remote PC Support is a means of helping you care for your computer. By means of a remote support program, such as Teamviewer, a connection is made between your computer (the HOST) and the Remote PC Support computer. This tutorial should help you know what you are dealing with when you request remote pc support.
You can read all of the tutorial or jump to:
When you’re connected
Deny/Allow Remote Control
Chat
Voice over IP
REMOTE PC SUPPORT SETUP
The connection is secure and only allows the remote pc computer to access the HOST when you allow it. Please Contact Us for more information or to answer any questions. We also welcome any comments as to how we can improve our service
To start you will be asked to go to www.teamviewer.com and click on a link “Join Remote Control Session” (click this link to go now).
You will be asked to Run or Save.
If you click run, the remote session will run one time only and will be removed from your computer when you close it. If you click Save, it will be kept on your computer for future use. You will need to double-click the icon to start the program, or right-click and choose open. You may wish to save it to the desktop if you anticipate needing to use it more than once.This is an executable program, which means it does not actually install anything on your computer, like many other programs, but is simply runs when needed. You at all times are in control of whether it runs or not, and whether you wish to allow remote control by the remote pc support computer. Once the program is closed, a remote connection cannot be made, until you run it again.
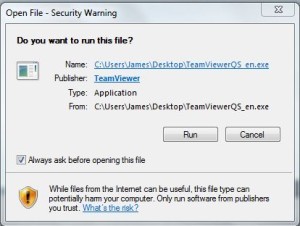
When you start the program, you will see a security warning similar to this. Click run:
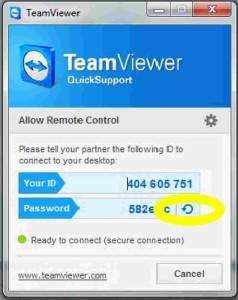
Now that you have clicked run, a screen like this will appear: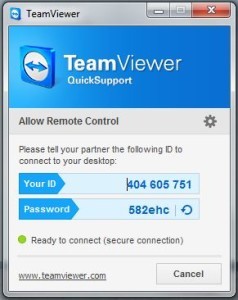
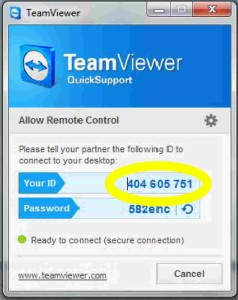
Your ID: This is the number that identifies your computer for use by Teamviewer. It is unique to your machine.
Password: The Password is generated by Teamviewer QuickSupport when you run it. A new password is generated every time you run it. You can experiment by closing and running it again and you will see a new password each time.
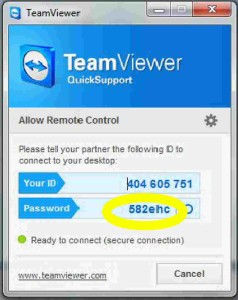
You can also manually reset the password at any time by click the Refresh button as shown below.
Please note: Anytime you close Teamviewer QuickSupport, one of the following screens or something similar will appear:
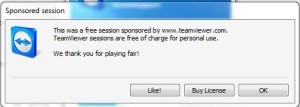
You can simply click OK. For the one below you can just close the window.
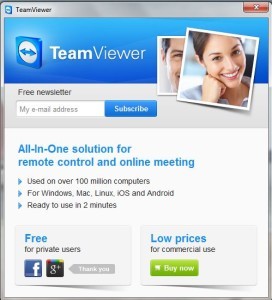
There are links to Facebook, Google+ and their newsletters as well as a link to their website.
REMOTE PC SUPPORT – WHEN YOU’RE CONNECTED
When Teamviewer first connects to your computer this session window will appear, usually in the right bottom corner of your screen. Your Desktop Wallpaper may also disappear, depending on the settings of the Remote computer.
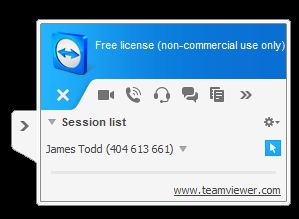
This is where you control the remote control session. The white “X” on the blue background under the Teamviewer logo will terminate your remote control connection at any time. To the right of the “X” there are icons as follows:Video, Conference call, Voice over IP, Chat, File Box, and Functions. More about these later. When any of these are open, there is a small asterisk icon to the right which provides options for these boxes, as well as to close them.
The Session list will show you who is connected to your computer and their unique Teamviewer ID.
REMOTE PC SUPPORT – Deny/Allow Remote Control
The blue box with an upward pointing white arrow to the right of the name can be used to turn remote control on or off. Simply click on it to change. When remote control is off, a diagonal line will appear across the arrow. Even when you allow remote control, you can still use your mouse and keyboard. If you use your mouse, for example, your action will take precedence over the remote control. That allows you to disconnect if you wish even though you have allowed remote control. So the choice is always yours.
REMOTE PC SUPPORT – OPTIONS
By clicking on the name in the Session list, the following choices will appear.
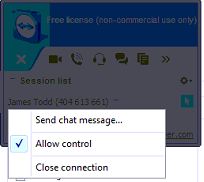
Here you can click the Allow control tab, and produce the same effect as using the blue box with the arrow, as stated earlier.
Close connection will remove remote pc support from your computer, but allow other connections to stay if you have multiple connections. This may be used if the remote computer has established a second connection, which can happen, but usually isn’t necessary.
REMOTE PC SUPPORT – CHAT
Chat can be started by using the above drop down menu and selecting “Send chat message”, or by clicking on Chat icon circled below.
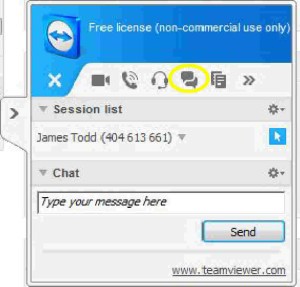
A chat window will open as shown. Simply type your message and press Send, or Enter, and a window will appear on the remote computer. this will allow a conversation to take place this way without the use of the telephone. This will free up your phone after an initial contact is made yet still allow your to ask questions or get instructions from the remote user.
REMOTE PC SUPPORT – Voice over IP
To the left of the Chat icon, you will see Voice over IP, represented by a headset.Clicking on this will open the following window.
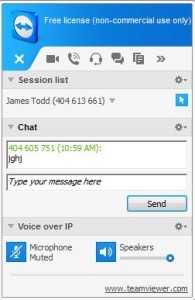
If you have a microphone and speakers on your computer, normal on newer laptops, or a headset which can be plugged into the headphone and mic jacks, which are found on both laptops and desktops, you will be able to use the Voice over IP feature. This allows using you computer much like a telephone, by using the Teamviewer connection to talk.
I hope this provides some understanding as to what happens with remote support.
Please go to “Make an Appointment” to arrange an appointment or Contact Us for more information or to answer any questions.
Back To Top of Post

With five computers in our home service through a computer repair shop has been a challenge. It was great to be able to contact you and have the problem remotely and quickly handled. Didn’t have to leave my desk and the price was great. Thank you.
Great service!!! Very helpful and professional…. thank you so much