Backup your files.
February 8, 2013
A cheap way to avoid an expensive disaster
Backing up your files is a cheap way to avoid an expensive disaster. How much is it to buy a backup drive? About $75.00. Backup software? $30 or less. An hour of consultant’s time to install and show you how to use it? About $100. Not losing your data? Priceless.
Above quoted from: https://www.sans.org/tip_of_the_day.php
If you don’t backup your computer, you will lose files, time and maybe money correcting the problem.
Having recently lost a few files myself, I feel compelled to update this article.
There are two important backups that should be performed.
1) Regularly backup documents that you want to keep.
2)Backup System Image whenever you make major changes to your system, such as add or remove programs, update important drivers, major windows updates, or add or remove a large number of files.
HOW TO BACKUP DATA.
Two things are needed. First you need a backup location, and second, a backup program.
If you have a small amount of data, a free online service may be all that is needed. Google Drive, and Dropbox are just two of the choices.
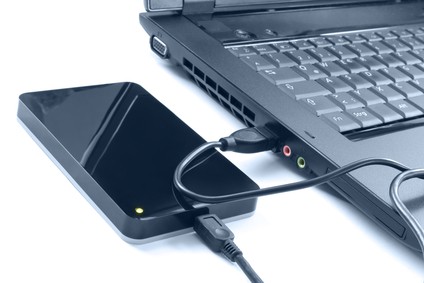
If you have larger amounts, you may wish to buy an external USB drive that you can attach to your computer and use for backups. This can also be used for travel and sharing your data.
So, how much data do you have? It is advisable to back up all of your user files. To find out the size, click the following:
Start Menu>Computer>Drive C(may be labeled as OS or Local Drive).
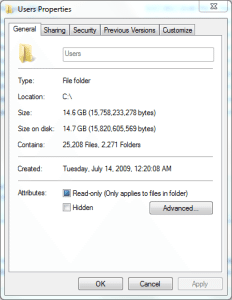
 You should see a folder “Users”. Right-click on this and click on Properties. A window like this should appear. Note the size of the folder, in this case 14.7 GB. That is the minimum size of storage you will need. Of course you will need space for future backups as your data file increase. Online storage of this size may need to be purchased, or an external drive may be preferred.
Once you have your storage area you will need a backup program.
Allway Sync is free for limited use or can be purchased. You can choose which folders you will backup, and easily set it up to back up your “Users” folder. It will check for files that have been changed and update your backup. It synchronizes your backup by only changing files that have been added or updated, so after the first time the backup process takes less time than a complete backup. I have used this program for a number of years and it works very well. You can set up a number of different backups to various devices.
Need help with Allway Sync? Feel free to contact me to set it up.
BACKUP SYSTEM IMAGE
A system image is a copy of everything on your hard drive: Documents, programs and operating system. When you make a system image, you can use it, along with a repair disk, to reinstall your system just as it was when you made the image. Most manufacturers include a recovery partition on the hard drive which allows you to restore you computer to factory defaults. In other words it can be restored to the way it was when you bought it. That’s good, but not best. Since you bought your computer, you have added programs, files and other customizations to have it just the say you want it. So why lose all that and start over. Besides, if your hard drive totally crashes and won’t work at all, the recovery partition won’t work either.
A system image will let you install everything to a new hard drive if your drive crashes.
How to do It

Starting with Windows 7, system image backup software is included. For Vista Home Premium and XP you will need a separate program, but the steps are similar.
First connect your backup media, such as an external hard drive.
(Note: DVD disks may be used and 3 will be required when the computer is new, with factory defaults. However a drive with 60GB of used space may require 15-20 dvds)
Windows 7 – Click Start Menu>Control Panel>Backup Your Computer(or Backup and Restore)
There are two choices: “Create system image” and “Create a system repair disc”.
If you haven’t created a system repair disc, you can do this now. Place a blank DVD in the drive and then click “Create a system repair disc”. A window will open and prompt you to insert a disk if you haven’t already done so. Click “Create disc” and wait until finished. Label the disk as shown and put away in a safe place. This will be used to restore a system image if needed.
Now for the System image. Click “Create system image”. You will be prompted to choose your backup drive: DVD or hard disk. Choose and click next. You will be asked to confirm your backup settings, including size of backup and the drives that will be backed up. When ready, click “Start backup”.
The next window will show the progress of the backup. If you have used dvds it will prompt you to change dvds when required and label them.
If you are using an external drive you can go have a coffee while it backs up. A 57 GB backup to a USB 2.0 external drive took about 45 minutes.
You can continue to use your computer for everyday tasks while the backup is being done, but should avoid major things like adding or removing programs, or windows updates.
When it is done simply disconnect the external drive. You will be prompted to create a system repair disk. If you don’t have one make it now.
My recommendation is that you only leave the external drive connected and running when needed. This will ensure that it doesn’t get infected if your main drive does, and avoid the possibility of a voltage surge, lightning or anything else electrical damaging your files.
I always make sure either the backup or the laptop computer travels with me. Having once lost a home due to a fire, I want to be sure that my files are in two different places when I travel.
So there you have it. If your time and data is valuable
BACKUP! BACKUP! BACKUP!